Showing posts with label how. Show all posts

Friday, July 10, 2020

How to Pick Herbs for Your Herb Kitchen Area Garden

How to Select Herbs for Your Herb Kitchen Area Garden


7996547815_27db6d5dfc_b.jpg


If you have chosen you want to develop your own kitchen herb garden, you need to initially pick what herbs to grow in it. As soon as you have done that you can start preparing your herb garden strategy and start taking a look at things like herb garden kits or herb seed brochures. To make things as easy as possible for you I have composed this article to teach you about the "3 things every herb gardener needs to understand" before heading out to buy herb plants or seeds.


How many different types of herbs do you wish to plant in your cooking area herb garden? Most people, when they are setting up their herb garden, choose about 5 or 6 kinds of herbs. But a recognized little to medium-size herb garden could have as many as 20 to 30 different types of herbs. However, I recommend that you start with simply a couple of, and build up the numbers of herbs as you gain experience.


If you have an interest in a specific kind of herb (garlic for instance), there are lots of resources available to help you investigate your picked herb and understand how to cultivate it successfully. But, if you spend excessive time on research, you'll never get your kitchen area herb garden developed. This post will help you to make your research task easier by teaching you about the different types of herbs that you could pick to grow in your herb garden, and provide you some concepts on how they could be used in and around your home.


1. The Main Categories of Herbs


Herbs, like other plants with which you will be familiar can be taken into three different categories - annuals, perennials and biennials. Annuals like basil, cilantro, and summer season savory die when the very first frosts show up, and they therefor need to be planted as seeds each year (or as plants if you purchase from a nursery). Sage and winter season savory are perennials and can endure chillier temperatures. They will return year after year. Finally there are the biennial herbs. These form their leaves throughout the very first growing season and after that flower and seed during the 2nd season. After this they pass away.


2. Tips on Growing Herbs in Your Garden


Biennial herbs like angelica and parsley can be sown in the garden in the late spring. Before you sow your seeds you should prepare the soil initially by simplifying until it has a great texture. Next make it extremely a little damp and plant the seeds in shallow rows. Lastly sprinkle a thin layer of soil on top and company it down.


Some herb seeds are difficult to sow because they are extremely great. The trick to sowing them uniformly is to blend them with very fine dry sand (like kids's play-sand). Spray the sand and seed mixture onto your seed-bed and after that cover with soil as described above. Another excellent tip is to cover your herb seed bed with wet sacking, woven cloth or absorbent paper to keep the soil moist during the period of germination.


3. The Different Uses of Herbs


Herbs are frequently put into categories which describe how they are frequently used. Cooking herbs are most likely the most popular for the herb kitchen area garden. They can be used in a wide variety of different methods cooking. Herbs like garlic, chives, thyme, sage, basil, majoram and mouthwatering have strong flavors. They are used often in different types of food, but just in small quantities (but that naturally relies on individual taste preference).


Fragrant herbs are grown for the smell of their flowers or foliage. Aromatic herbs like mint, lovage, and rosemary contain necessary oils which can be used in perfumes, aromas and toilet waters. Some aromatic herbs like lavender are used as complete plants. They are dried and put into muslin bags and then used around the home to scent linens and clothing. Another popular use of these herbs is to make potpourri, a mixture of dried, fragrant herbs which is used to provide fragrant aromas in houses. You may typically come across ornamental wooden bowls of potpourri including lavender, lemon verbena, marjoram and mint. There are great deals of combination's of herbs which can be used to make potpourri. If this is something you would like to try, you'll have great enjoyable comprising the natural mixtures.


Some herbs are also used for to promote health and aid recovery. These are called medical herbs. There are great deals of stories and examples of how herbs have been used for medical functions, a few of them returning to the times of the ancient Egyptians.


Present medical knowledge still recognizes that some herbs are beneficial to health, but many claims produced medical herbs are now believed to be over-rated. If you do decide to use herbs from your cooking area herb garden for medicinal functions you need to exercise care. Whilst many herbs are completely safe, others (such as hemlock) can be dangerous if eaten.


Some herbs are grown simply for their appeal; they are called decorative herbs. These herbs have vibrantly colored flowers and foliage. Valerian for example, has crimson blossoms and borage and chicory have blue flowers.


However, although these categories are useful, many of the herbs you can grow in your herb garden have numerous usages. For example, mint can be used to make mint tea or used in cooking. It can even be used in the garden for insect control!


I hope this post has actually provided you some ideas which will promote your interest in herbs and allow you to pick those kitchen garden herbs that will be of most use to you.


Discover a lot more about selecting your garden herbs [http://www.herb-gardening-help.com/choosing-your-garden-herbs/] by visiting Adam Gilpin's site. On his website you'll find extra details and images to complement this article and great deals of ideas and ideas about all elements of herb growing. You'll also learn about how to use herbs to produce remarkable meals and promote health and well-being.


To help herb gardening novices Adam has created a complimentary email teaching course on herb growing, and for those who want to take the next step in learning about the terrific world of herbs Adam has produced a digital book "The Secrets of Effective Herb Growing". Both of these discovering resources can be accessed on Adam's site.

THE YUMMY HERBS EBOOK

How to Choose Herbs for Your Herb Cooking Area Garden

How to Choose Herbs for Your Herb Cooking Area Garden


7996547815_27db6d5dfc_b.jpg


If you have chosen you want to create your own kitchen area herb garden, you need to initially pick what herbs to grow in it. Once you have done that you can start preparing your herb garden plan and start looking at things like herb garden sets or herb seed catalogs. To make things as easy as possible for you I have composed this post to teach you about the "3 things every herb gardener needs to know" before heading out to buy herb plants or seeds.


The number of different kinds of herbs do you wish to plant in your kitchen herb garden? Most people, when they are setting up their herb garden, pick about 5 or 6 types of herbs. But an established little to medium-size herb garden might have as many as 20 to 30 different types of herbs. Nevertheless, I recommend that you start with simply a few, and develop the varieties of herbs as you gain experience.


If you have an interest in a particular type of herb (garlic for example), there are lots of resources offered to help you investigate your chosen herb and understand how to cultivate it effectively. But, if you invest too much time on research, you'll never ever get your kitchen herb garden developed. This post will help you to make your research study task much easier by teaching you about the different types of herbs that you might choose to grow in your herb garden, and give you some concepts on how they could be used around your home.


1. The Main Categories of Herbs


Herbs, like other plants with which you will recognize can be taken into 3 different classifications - annuals, perennials and biennials. Annuals like basil, cilantro, and summer mouthwatering die when the first frosts get here, and they consequently need to be planted as seeds each year (or as plants if you buy from a nursery). Sage and winter season savory are perennials and can survive colder temperature levels. They will return year after year. Finally there are the biennial herbs. These form their leaves throughout the first growing season and after that flower and seed throughout the second season. After this they pass away.


2. Tips on Growing Herbs in Your Garden


Biennial herbs like angelica and parsley can be sown in the garden in the late spring. Before you plant your seeds you need to prepare the soil first by simplifying until it has a fine texture. Next make it very a little damp and plant the seeds in shallow rows. Lastly spray a thin layer of soil on top and company it down.


Some herb seeds are tough to plant because they are extremely great. The trick to sowing them evenly is to mix them with really fine dry sand (like children's play-sand). Spray the sand and seed mixture onto your seed-bed and then cover with soil as described above. Another good suggestion is to cover your herb seed bed with damp sacking, woven fabric or absorbent paper to keep the soil moist throughout the duration of germination.


3. The Different Uses of Herbs


Herbs are often put into categories which describe how they are most often used. Cooking herbs are most likely the most popular for the herb kitchen garden. They can be used in a vast array of different ways in cooking. Herbs like garlic, chives, thyme, sage, basil, majoram and tasty have strong flavors. They are used often in different kinds of food, but only in small quantities (but that obviously relies on individual taste choice).


Aromatic herbs are grown for the smell of their flowers or foliage. Fragrant herbs like mint, lovage, and rosemary include vital oils which can be used in perfumes, fragrances and toilet waters. Some fragrant herbs like lavender are used as complete plants. They are dried and put into muslin bags and after that used around the home to scent linens and clothes. Another popular use of these herbs is to make potpourri, a mix of dried, fragrant herbs which is used to offer aromatic scents in houses. You may frequently come across decorative wood bowls of potpourri consisting of lavender, lemon verbena, marjoram and mint. There are lots of combination's of herbs which can be used to make potpourri. If this is something you would like to try, you'll have great fun comprising the organic mixtures.


Some herbs are also used for to promote health and help healing. These are called medicinal herbs. There are great deals of stories and examples of how herbs have been used for medical functions, some of them going back to the times of the ancient Egyptians.


Present medical knowledge still acknowledges that some herbs are beneficial to health, but many claims made for medical herbs are now thought to be over-rated. If you do choose to use herbs from your kitchen herb garden for medical functions you need to exercise caution. Whilst many herbs are entirely safe, others (such as hemlock) can be harmful if consumed.


Some herbs are grown simply for their beauty; they are called decorative herbs. These herbs have brilliantly colored flowers and foliage. Valerian for instance, has crimson blossoms and borage and chicory have blue flowers.


Nevertheless, even though these classifications work, many of the herbs you can grow in your herb garden have multiple usages. For instance, mint can be used to make mint tea or used in cooking. It can even be used in the garden for insect control!


I hope this short article has given you some ideas which will stimulate your interest in herbs and enable you to pick those kitchen garden herbs that will be of a lot of use to you.


Discover a lot more about choosing your garden herbs [http://www.herb-gardening-help.com/choosing-your-garden-herbs/] by going to Adam Gilpin's website. On his site you'll find additional info and photos to match this short article and lots of concepts and ideas about all aspects of herb growing. You'll also learn about how to use herbs to develop unforgettable meals and promote health and wellness.


To help herb gardening beginners Adam has actually put together a complimentary email teaching course on herb growing, and for those who want to take the next step in learning about the fantastic world of herbs Adam has produced a digital book "The Secrets of Successful Herb Growing". Both of these discovering resources can be accessed on Adam's website.

https://organicgardeningadvise.com/the-yummy-herbs-ebook

Monday, April 20, 2020

Set Up a Bowflex Home Fitness Center


Establish a Bowflex House Gym


When you remain in a place where you are considering making a sure that you are actually visiting be actually acquiring the best out of your workout session, you would like to make sure that you are actually going to be starting effectively through seeing to it that you can place the Bowflex home fitness center together from the beginning! Whether you are an individual that has a great deal of adventure when it relates to placing factors with each other or even you are actually in a place where you are actually just not very used to it whatsoever, the what's what is that the Bowflex home fitness center may be come up with relatively simply. Though there are actually many components to it, and though it can be actually a bit opportunity consuming, you are going to find that so long as you go slow-moving and make sure that you understand what is actually happening, you are mosting likely to reside in pretty good shape.The very first thing


that you need to consider when you are considering producing a Bowflex home fitness center is actually that you need to agree to get in touch with assistance if important. When you remain in a place where you are actually putting a lot opportunity and money lucky such as this, bear in mind that tech help exists for a factor! There are many components to the Bowflex, as well as though there is actually a lot to be mentioned for moving on on the toughness of the guidelines along, regularly keep in mind that receiving some help can help a lot. Take a while and also ensure that you maintain the specialist help variety in mind. This can go a lengthy way towards receiving your targets ensured of.The 2nd point that you ought to keep in mind when you are actually appearing

COOWOO Resistance Bands Set Exercise Bands with Door Anchor Video


at putting with each other a Bowflex home fitness center is that it is actually mosting likely to take an even though. Some people can place it all together a machine like this in a handful of hrs, while people are extra satisfied to wait and to take on placing all of them all together over a variety of days. Only keep in mind that you are actually appearing at ensuring that you are heading to have the capacity to move on with additional time than you want. If you are actually bothered with receiving it put together on a time timetable, leave it in the container until you have additional time. While not placing it all together as quick as you will as if is annoying, thus is evading about a mess for a couple of days.When you desire to make sure that you are mosting likely to have the capacity to continue and to get the correct sort of arise from your


building and construction undertaking, bear in mind that you should lay every thing out. Take some time and also really determine what components you have in palm. On the off opportunity that you have a part skipping, it is actually constantly much better to find out beforehand, before you have the Bowflex fifty percent constructed!Take time as well as really consider what your possibilities are actually when you are actually taking a look at creating your Bowflex. It is not achievable,


so simply individual and make certain that you are actually going to get the amount of time that you need to place it together

click here

Monday, April 13, 2020

How Many Calories in Pineapple


How Many Calories in a Pineapple

There are 74 calories in pineapple per cup (155 grams). Pineapples are an exceptional alternative to a sweet dessert due to its sweet taste. You can eat in pineapples in several ways: fresh, frozen, in heavy or light syrup, crushed, chunks, wedges, spears or slices. The calories in pineapplevary depending on how it is served. They can be served alone or to make a dish look welcoming and compliment the taste. There are hundreds of kinds of pineapples but there are four primary groups: Smooth Cayenne, Abacaxi, Red Spanish and Queen.


Smooth Cayenne is the most popular of all the varieties. As a fresh pineapple off the tree, the Smooth Cayenne pineapple grows to be the biggest at four to 10 pounds. It has an extremely low fiber material, abundant sweet taste, and is really juicy. For those that suffer from high acidic stomach issues but still have a love for pineapples, the Smooth Cayenne pineapple has an extremely low acidic material for that reason would be tolerable on the stomach. It is mainly used for canned pineapple.


Abacaxi, also known as the pernambuco, pineapple is very tender compared to the varieties. This fruit weighs from 2 to eleven pounds. Abacaxi pineapple is known for its delicious flavor. This pineapple plant is extremely disease resistant.


The Red Spanish is a bit smaller than other pineapples, as this pineapple only reaches around three to 6 pounds. It is resistant to fruit rot but is more vulnerable to plant disease. The Red Spanish is a very flavorful pineapple.


The Queen pineapple is the smallest of the pineapples weighing in between one to two and a half pounds. This variety is very fragrant and juicy. In addition to the Abacaxi, the Queen is also disease resistant and cold resistant. Queen also has some fiber material which benefits a diet rich in fiber.


Health Benefits and Nutritional Facts


Pineapples are an excellent source of numerous vitamins, manganese, bromelain, copper and dietary fiber. Pineapples aid with the food digestion of protein and can help avoid embolism. The bromelain material in pineapples has been found to be helpful in decreasing swelling, helping sinusitis, aching throat, arthritis and gout.

Pineapple is a good source of vitamin C, which helps your body safeguard against free-radicals that assault healthy cells. In addition to safeguarding your body's cells, vitamin C is an outstanding source to help battle colds and flu. The manganese and vitamin B1 found in pineapples supplies enzymes in the body for energy production.

Research has actually found that a few of the molecules in the stem of pineapples are helpful in the security against kinds of cancers like ovarian, breast, lung, colon and skin. Integrating pineapples in your everyday diet helps fight bronchitis, dyspepsia, irregularity, arthritis and preventing nausea triggered by morning sickness and motion sickness. Fresh pineapple juice has actually been used to get rid of digestive worms.

https://organicgardeningadvise.com/how-long-does-it-take-for-a-pineapple-to-grow


How Many Calories in Pineapple


The Number Of Calories in a Pineapple

There are 74 calories in pineapple per cup (155 grams). Pineapples are an exceptional option to a sweet dessert due to its sweet taste. You can consume in pineapples in many different ways: fresh, frozen, in heavy or light syrup, crushed, portions, wedges, spears or slices. The calories in pineapplevary depending upon how it is served. They can be served alone or to make a meal appearance welcoming and compliment the taste. There are hundreds of types of pineapples but there are 4 main groups: Smooth Cayenne, Abacaxi, Red Spanish and Queen.


Smooth Cayenne is the most popular of all the varieties. As a fresh pineapple off the tree, the Smooth Cayenne pineapple grows to be the largest at four to 10 pounds. It has a very low fiber content, rich sweet taste, and is extremely juicy. For those that struggle with high acidic stomach issues but still have a love for pineapples, the Smooth Cayenne pineapple has a really low acidic material therefore would be tolerable on the stomach. It is primarily used for canned pineapple.


Abacaxi, also known as the pernambuco, pineapple is very tender compared to the ranges. This fruit weighs from two to eleven pounds. Abacaxi pineapple is known for its delicious flavor. This pineapple plant is highly disease resistant.


The Red Spanish is a bit smaller sized than other pineapples, as this pineapple just reaches approximately three to six pounds. It is resistant to fruit rot but is more prone to plant disease. The Red Spanish is a really tasty pineapple.


The Queen pineapple is the smallest of the pineapples weighing in between one to 2 and a half pounds. This variety is really aromatic and juicy. Along with the Abacaxi, the Queen is also disease resistant and cold resistant. Queen also has some fiber content which is good for a diet plan rich in fiber.


Health Benefits and Nutritional Realities


Pineapples are an exceptional source of multiple vitamins, manganese, bromelain, copper and dietary fiber. Pineapples assist with the digestion of protein and can help avoid blood clots. The bromelain content in pineapples has actually been found to be beneficial in reducing swelling, assisting sinus problems, sore throat, arthritis and gout.

Pineapple is a great source of vitamin C, which helps your body protect versus free-radicals that assault healthy cells. In addition to securing your body's cells, vitamin C is an outstanding source to help battle colds and flu. The manganese and vitamin B1 found in pineapples supplies enzymes in the body for energy production.

Research study has found that a few of the molecules in the stem of pineapples are helpful in the protection versus types of cancers like ovarian, breast, lung, colon and skin. Incorporating pineapples in your everyday diet helps fight bronchitis, dyspepsia, irregularity, arthritis and preventing nausea triggered by early morning illness and motion sickness. Fresh pineapple juice has actually been used to remove digestive tract worms.

Visit link here


Tuesday, March 17, 2020

A Great Negative Calorie Food

 A Great Negative Calorie Food

photo-1565953613603-4e0fb19aba11?ixlib=rb-1.2.1&ixid=eyJhcHBfaWQiOjEyMDd9&auto=format&fit=crop&w=700&q=80

One of the most intriguing foods that frequently appears on the negative calorie food list is pineapple. Amongst unfavorable calorie foods, pineapple is most likely the greatest in calories, so how can a fruit with a solid quantity of calories be a negative calorie food?


Well in the unfavorable calorie foods diet plan, there are many different factors in determining the amount of energy it takes to burn numerous kinds of unfavorable calorie fruits and vegetables, and total calories is just part of that equation. While pineapple has a lot of calories for a negative calorie food, pineapple is still a fruit, indicating it has far less calories than grain, meat, or a lot of other foods of the exact same size.


Another substantial advantage to pineapple, and part of the reason that pineapple stays an unfavorable calorie food, is that it consists of a huge amount of vitamins and dietary fiber (believe clean the system great). Include low calories with heavy vitamins and high fiber, and the digestion enzymes go wild over this fruit, causing some who believe in the negative foods diet plan to strongly authorize of pineapple as a great negative calorie food.


I'm personally a huge fan of pineapple, given that it is one of the more filling of the negative calorie foods, and gives a lot of energy, vitamins, and fiber that you need to survive a day. Whether pineapple in fact has a true unfavorable calorie result is difficult to state, and pineapple seems among the least likely fruits or veggies on the unfavorable calorie foods list to really have an unfavorable calorie effect, but even if it does not, pineapple is an extremely healthy fruit that has everything you need to get your digestive and metabolic systems working at full throttle.
Pineapple has actually the anticipated large quantity of vitamin C, and small amounts of Vitamin A, calcium, and even some iron. The greatest favorable of pineapple is the big quantity of dietary fiber, as well as the good types of carbs that give you energy and keep your system balanced. If you like the flavor of pineapple and are like me, you can woof down this negative calorie reward by the can.


An extremely essential point when searching for negative calorie fruits such as pineapple: focus on the ingredients. Many business that produce pineapple add additionals like sugar or high fructose corn syrup - prevent these cans of pineapple at all cost. Look for the pineapple whose components read merely: "Pineapple, Pineapple Juice." That need to be all you see in there. If not, try to find another can of rings or slices ... or perhaps better, buy it fresh if your local grocery store has it readily available

https://organicgardeningadvise.com/how-long-does-it-take-for-a-pineapple-to-grow/

Friday, March 6, 2020

Ways on Just How to Beginning and Keep a Compost Pile


Compost tumbler bin


Due to worldwide warming problems came across today, various procedures on how to improve the Earth's condition are a should to be implemented. The concept of recycling today is not just an option to be made but rather a need. One way you can help the environment is to find out how to make your own compost heap.

https://organicgardeningadvise.com/how-to-use-compost-tumbler

Through this system, you can gain from many things. One of which is that you can decrease the waste in your home. The stack can also be a way to have abundant soil and great source of natural fertilizer for your plants. Hence, you get to collect monetary cost savings through many ways. On the other hand, such benefits can just be taken pleasure in if you have the right type of composting system. For starters, below are some guidelines on how you can be a success in starting and keeping a compost pile.


There are so many composting systems available, which can range from do-it-yourself procedures to ready-made options. Below are a few of the most commonly used systems:


1. Using a shop bought tumbler with built-in crank - You can buy containers from a garden and lawn store. These are relatively more pricey than other bins. But if you lack the time yet need an instant option for composting, having these to include your compost would be preferable as these are very easy to handle.


2. Making your own cylinder - The most typical product used for this container is chicken wire. This is relatively cheaper but the procedure of making the bin would take up a lot of your time. But if you can dedicate as much attention to this job, then this would be a beneficial means to create compost containers.


3. Making use of 3 wooden bins - This system is primarily consisted of putting 3 wood bins adjacent one another. Each of the bins has particular purpose. The very first one is for holding the new products. The 2nd one is to hold the partly disintegrated materials. And the third one is to hold the totally decomposed compost.


4. Having a freestanding pile or pit - This choice is for property owners who have a wide uninhabited lot a minimum of a couple of hundred meters away from your home structure. This is necessary due to the fact that this system is the one probably to bring in pests and rodents. Nevertheless, if it is preserved effectively, it can be the most inexpensive and most convenient approach to create compost.


Additionally, before finalizing your decision on which system to execute in your home, you need to ask from appropriate local agencies whether there are sponsorship programs regarding developing a compost pile. There are some areas in which certain attires offer homeowners with bins or offer very little financial assistance.


Other things you need to keep in mind include proper layering and selection of materials to be put in the stack. Some items you must not include in your stack are meat, bones, fish craps, seasonal weeds, infected plants, fruit peelings and skins and black walnut leaves. These products will bring in pests or consist of pesticide residue. Hence, the compost itself would end up being too unhealthy to be used as fertilizer. Some more effective biodegradable materials to be used are chopped leaves, eggshells, lettuce leaves, coffee grounds, wood ash and sawdust. Alternate the layers generally this way - waste, soil and manure. Repeat layering till you have produced at least a 3-feet high stack.


Main upkeep ideas for your compost to be at its outstanding condition would comprise of turning the stack with rake or pitchfork as soon as a week, making sure the stack has sufficient shade, and sprinkling little amount of water on the top layer. These easy care pointers would make your stack bountiful of helpful organisms, hence quickening the process of having nourishing fertilizer and abundant soil.


These mechanisms are great ways to have a natural source of keeping your garden healthy. At the same time, you are improving the condition of the environment in your little way.


Click Here to Learn more about How to use compost tumbler


Wednesday, November 13, 2019

How to prevent freezing pipes


How to stop freezing pipes

In cold weather, the water pipelines in drafty or unheated regions of your home may undergo icy. Cold weather temperature levels alongside windy health conditions accelerate the cold procedure. Pipelines can ice up and thaw or even even worse: freeze, crack, thaw and spray, sending an unchecked flow of water that can do cut damages to a home. Water harm is actually the best common and most pricey insurance coverage case. Thus be actually positive, as well as no matter where feasible relocate pipelines that are actually topic to icy to warmer areas of the house.What may stun many is

the fact that warm water pipelines will commonly freeze faster than chilly water pipelines. So, feature both when looking at the very best answer. Below are many points you may do to help prevent icy water pipes: o INSTALL PIPE INSULATION -It is actually a great process to shield water pipes

of outside wall surfaces, and also in floors or even roofs that are actually subjected to the outside.o WINTERIZE OUTSIDE SPIGOTS-Start through shutting down any type of outdoor faucets from inside your house.


Then, open all of them from the outside and also let any kind of recurring water drainpipe. As well as make sure to detach your yard hoses coming from any kind of outside faucets to stop them coming from splitting as well as cracking.o TRY THE TRICKLE SOLUTION- In areas of the home where pipelines may frequently freeze, transform the faucet on generate a sluggish, consistent flow of water.


The continual flow of water through the pipelines will avoid all of them from becoming frozen.o INSTALL A RECIRCULATING PUMP -Another innovative way to keep freeze-prone water pipes moving is actually through putting in a warm water recirculating pump. This sort of pump drives


chilly water out the scorching water pipes till it detects warm water. Then it stops and starts the cycle again to always keep the water moving.o HEAT TAPE-In some instances house owners may opt for warm tape or even an electrical wire heating system to keep water pipes hot. Nevertheless, these kinds of answers can lead to complications ought to the unit itself or the source of power fail.


This can also show a fire hazard if used with the wrong insulation.On the events when Mother Nature takes sub-zero temperature levels to your area and icy pipes take place; they could be melted through several methods: o The best technique is to use a power hair dryer to use heat straight to the frosted area of pipe.o Pipes that go through

a garage to a tube faucet could be drained pipes or burnt out along with a compressor.o Pipe thawing devices will certainly work properly in many uses. This unit uses cables comparable to


auto jumper cords. They affix to the pipe on either side of an ice block making it possible for power current to pass through the pipeline and also warm it

, thawing the ice.Copper pipelines usually split, nonetheless plastic PEX collections might ice up, increase and thaw without splitting.


If your pipes ice up, make certain you recognize where the principal shut down shutoff is actually. If you have to leave your home it is actually smart to shut the water off, or even threat coming home to a" automatic sprinkler "entering your home.

More Info


Power Outage? - Beware of Frozen Water Pipes


Among the most prevalent home insurance coverage declares that are reported when there is a power interruption throughout cold weather condition is that of frozen water pipelines.


Water pipes that lie in the outside walls of your home are most at danger of freezing. If your kitchen area or bathroom is found against an outside wall, you need to take actions to prevent these pipelines from bursting and triggering significant water damage in your house.


What Causes pipelines to burst?


It is not the expansion of ice versus the wall of the pipe that triggers a pipeline to break. It is the ongoing freezing that causes water pressure to increase between the ice blockage and a closed water faucet that causes the pipe's failure.

The pipe might not break where it is actually frozen.


There are 3 things that you can do to help prevent this from happening.


1. Open the bathroom and kitchen cabinet doors to allow warmer air to distribute around the plumbing in the cabinets under the sinks. This will help keep the pipelines warmer and for that reason help avoid freezing.


2. Turn on both cold and hot taps to allow a steady drip of water from the sinks, tub and shower.

Yes, the dripping faucets will waste some water, so open just the taps that are provided by pipelines that are vulnerable to freezing. These are the ones that go through an exterior wall or unheated area. If not sure, let all taps drip. It is less costly than repairing water damage.


Even the slowest drip will supply pressure relief when there is a risk of freezing. If there is no extreme water pressure, there is no burst pipeline, even if the water inside the pipe freezes.


Where both hot and cold lines serve a single spout, make sure that each one adds to the sluggish water flow. If the leaking stops continue to leave all the faucets open. A pipe might have frozen and will still need to have pressure relief.


3. In really cold temperature levels, you ought to consider draining all the water from the pipes.


This is the best secure against damage. With no water in the pipelines, there is no freezing. This course of action must be used whenever there is a severe threat of the pipelines in your house freezing.


To drain pipes the system you must initially shut off the main valve where the water supply enters your home. If there is a drain cock on the shutoff valve, open it.

Then open every water tap in the house, both hot and cold, up until there disappears water running. The water will drain pipes out through the most affordable faucets until the pipes are empty.


The warm water tank should also be drained pipes if it lies in a location where the temperature level might fall below freezing for a prolonged time. There is a drain valve located on the side of the tank near the floor.


If you do have a frozen pipe, apply heat to that section of pipeline by wrapping it with towels taken in hot water.


Do not use any kind of torch, lp heating unit, kerosene or a charcoal BBQ to thaw frozen pipes. Application of high heat can make the water in a frozen pipeline boil and the pipeline to blow up, with the possibility of serious injury.


Keep in mind that all open flames inside your home provide a severe fire threat, in addition to an extremely severe threat of exposure to deadly carbon monoxide.


More Info


Saturday, April 13, 2019

Growing pineapple


Growing pineapple


It includes several minerals and vitamins and also tastes great. Not surprising that Pineapple is thought about to be a marvel fruit. Pineapple is typically grown in a tropical kind of environment as it flourishes primarily then. Nevertheless if you can keep in check, the amount of cold winds and frost it is being exposed to, you can grow pineapple in any kind of climate. You can start learning how to grow pineapple inside your house if you live in an area having cold weather conditions. Yes it is possible to do so, but don't expect to get the very same type of fruit you would from tropical regions like Hawaii.


You can follow the steps given below to grow pineapples:


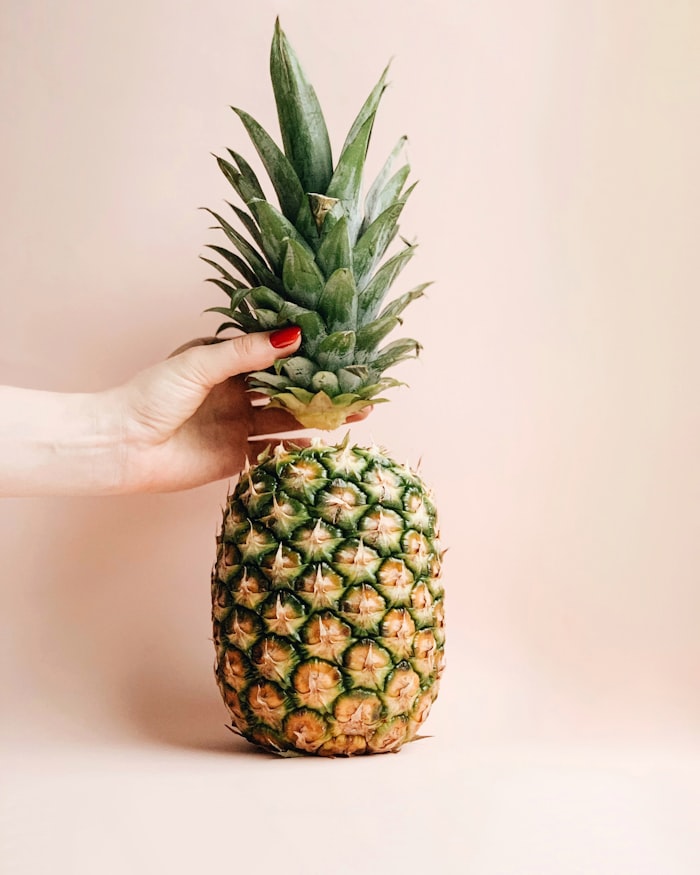
Step 1: The primary step is to buy a pineapple, from a fruit stand, a grocery store or from anywhere really. You can remove the strip and enjoy the fruit. All you need to keep is the crown. The crown will help you grow your plant.


Action 2: Prepare your soil. You must make sure that while keeping it moist, you ought to not allow the soil to keep water for long periods of time. You can put any quantity of fertilizer to keep the soil healthy and apt to grow the fruit into.


Step 3: Now, you need to collect a hole in the soil and plant the pineapple on top, keeping the crown of the fruit exposed. As soon as the pineapple has been planted in place, you need to water it routinely and fertilize it. Watering the pineapple requires to be done when in a week and feeding it with a fertilizer is required once in every two months.


Step 4: 20 Months are needed for a pineapple plant to produce a delicious fruit under tropical conditions. However your plant can take longer periods of time to bear fruit.


Step 5: If you see a flower growing after awaiting a minimum of a minimum of 4 months, that's your sign that the pineapple fruit is practically all set. By seeing an abundant golden color of the shell, you can inform that the fruit is ripe. The ripening of a fruit can be seen by the modification in color of the pineapple. The change in color begins at the bottom and slowly moves up-wards as the fruit ripens.


You can also keep some of the following points in mind while planting pineapples:


A pineapple will always taste better when it has actually been ripened on a plant instead of on shelves. Talking on a more business level, the pineapple is secured of the plant well before it has actually reached its full potential.


To safeguard the pineapple fruit from cold harsh weather conditions, you can grow it inside your home. Nevertheless you need to guarantee that the plant still gets adequate sunlight. Excessive watering can eliminate a plant. So avoid it.


Gardening is always a pleasure. If tending your garden alone, it provides you a time of privacy and peace which is most useful for urban occupant who is always surrounded by all the rowdiness and noise; and very much need that get-away. If you can have a possibility to enjoy gardening in a neighborhood, you will find that that is a great opportunity for you to mingle with your next-door neighbors and buddies; and fulfill great people of like-mind.


You do not need to restrict yourself to growing just one specific series of plants. It is always a wonderful experience to check out growing different kinds of plant. One, two or even more growing failures does not suggest that you do not have green fingers. It just reveals that you have not acquire the knowledge of growing that particular kind of plant.


Today, I want to show you the fun of growing pineapple.


- Choose a fresh looking pineapple. You can easily get one from the fruit store. Get one that still has a top with all the green spiky leaves still connected. Evaluate out the freshness by shaking a leaf from the top to see if it comes off quickly. If it does, pick another one that does not have its leaf drop off easily when you tag at it.


- Cut off that part of the stem of the pineapple where the leaves begin to grow. The fruity part of the pineapple is not needed. Any fruity part if left connected with the stem will cause decomposing later.


- Pluck off all the lower or external leaves of the pineapple stem, leaving just about 5 or 6 huge leaves and whatever smaller sized leaves that are still in the centre.


- Leave the pineapple stem to dry for a couple of days so that it will harden off. Decaying is not likely to happen if the stem is solidified.


- Let the pineapple stem stand in a shallow meal of water about 1/2 inch deep. Deep adequate to dip your pineapple stem into but not so deep regarding touch the leaves. I suggest using a round container so that your pineapple stem can stand upright.


- Now leave the pineapple stem in a brilliant location but far from direct sunlight. Let it remain there for a few weeks to wait for the roots to establish.


- When the roots have established, transfer the pineapple stem into a deep pot filled with well-drained potting mix or any sunny spot of your garden that has well-drained soil to continue growing up until fruiting happens.


- Finally, if it remains in a pot, leave your potted pineapple plant in a warm area. Pineapple plant delights in complete sun.

How long does it take to grow a pineapple? Pineapples are relatively sluggish growing Bromeliads. From slips they take about a year to mature enough to form a flower for fruit. From suckers about 1 1/2 years to form flowers and from cuttings they can take 2 1/2 years to mature enough to flower. Once they flower it takes another 6 months for the fruit to grow

What Does the Pineapple Symbolize?-How long does it take to grow a pineapple

The influence of the pineapple fruit is apparent in the charming selection of decorations available that use the pineapple kind as part of its creation. We become aware of architectural elements like pineapple pedestals, pineapple brackets and corbels as well as pineapple wall sculptures, and of its use in the kitchen area in the form of pineapple napkin holders and trivets in addition to bookends to grace your desk and library with hospitality and an air of friendliness and warmth. The pineapple has certainly a colorful history covering from colonial times and is today heralded as the princess of fruits and credited as the symbol of hospitality and welcome. To offer the pineapple as a gift communicates your intention to promote friendliness and graciousness to the recipient. The pineapple began initially as the fruit of the rich and guests were revered and charmed when a pineapple was placed in the middle of their existence in the dining location for that suggested the quantity of regard and consideration the hostess besot upon them. Colonial America drew a revitalizing and motivating methods in using the pineapple motif in indulging their visitors to the table and for a night invested at their home. Fresh pineapples were welcomed and appreciated as a costly dessert for guests while the thought of spending time in a space heavily embellished with pineapple styles in the bedposts or headboards were considered luxurious and pleasing.

The Origin of the Pineapple: The pineapple fruit may have originated from Brazil and Paraguay in South America where it apparently received a boost into the European markets through Christopher Columbus who found the pineapple fruit in Guadeloupe in 1493. It was nicknamed the "pina" considering that it looked very much like a pinecone and gave Spain. Sir Walter Raleigh was also really interested in the pineapple which he affectionately termed as the princess fruit. The interest in bringing this fruit into Europe then started. However, the Europeans were uncertain how to grow the fruit and its arrival into Europe just started around the late 16th Century taking the Europeans practically two long centuries to study and grow this much desired fruit. When in Europe, this scrumptious fruit eventually wove its way into Holland and England. The English society was extremely amazed with the very first pineapple produced by the Royal Gardener, Mr John Rose for Charles II that it also motivated Hendrick Danckerts to paint the picture of the presentation of the fruit in 1675. The much renowned pineapple was then grown in India and infected China and in 1777, offered in the Pacific Islands through Captain Cook.

The Inspiration of the Pineapple: The English who were overwhelmed with the lovely pineapple fruit drew motivation from its looks and distinct shape. As a result, the pineapple fruit motivated the coat of arms and was used as an architectural component in pottery and planters. The creative appeal and ornamental effect that the pineapple fruit rendered were substantial and the pineapple sign influenced bed posts, tablecloths, napkins and napkin holders as well as bookends and candle holders. The symbol of this valued fruit grew to be represented on any kind of decorations that were noticeably displayed for visitors to enjoy and feel invited. Even till today, the pineapple fruit raises much interest in states like Virginia, Hawaii and Florida where making use of pineapple themed accessories and gifts contribute in highlighting the peace caring and congenial people who reside within.

The Medicinal Powers of the Pineapple: The pineapple is also credited with having healing powers and records indicate that its yummy juice was used for treating throat infections, arthritis, bronchitis and indigestion. The use of the pineapple for the treatment of diseases was nevertheless restricted to the locals who initially grew them. It is not specific as to whether this fruit was used for any recovery purposes in colonial America. Modern research studies also verifies that the fruit includes an enzyme called "bromelain" which may be used in the treatment of cardiovascular disease, combating sinus congestion and also be used in the treatment of urinary tract infections. Fresh pineapple is loaded with Vitamin C and accelerate tissue development and repair work. Worthwhile of note however is that bromelain is contained in fresh pineapple and canning appears to ruin this enzyme but not the Vitamin C content.

The Entry of the Pineapple into the Americas: Colonists started importing this tasty fruit from the Caribbean in the 17th Century and it soon settled as one of the revered and extravagant fruits known offered to the rich. Considering that it was challenging to generate this fruit into the nation given that the trade routes where this fruit was obtained was considered hazardous, it was considered a marked accomplishment to come up with such an uncommon fruit for the guests. That event was often booked for the wealthy class to take part and enjoy but there was also event when the pineapple was rented to elevate a person's rank in society for showing the ability in giving the table such an expensive fruit for screen. The pineapple fruit then eventually began to take on a new significance as a sign of warmth and friendliness. It was the crowning piece used for the big displays of food that the wealthy brought forth to the table. The hostess took much discomfort and difficulty in elevating her family's social status in colonial American society by introducing pineapple display screens as it showed a resourcefulness in engaging a distinct screen of food for all to appreciate and share. History records that New England sea captains would impale a pineapple outside their homes on gateposts or on their front doors as a symbol of safe return after returning from dangerous trade routes in the Caribbean or Pacific. Today, business production of pineapples is credited in the state of Hawaii and Florida where Hawaii is significantly among the world's biggest producers of canned pineapples.

Using the Pineapple Theme in Decorating: Even till today, Americans continue to show interest in decorating the home with pineapple designs. Not just are pineapple styles common in the home in places like the foyer and living areas along with kitchen, they are also visibly displayed in the form of pineapple finials on gateposts or as water fountains for the garden. Using pineapple plaques highlighted with the warm, inviting words "Welcome to our Home" has ended up being a common sight. Virginia still continues to be one of the main states that ardently shows pineapple concepts and designs in a lot of their household devices, still highlighting the pineapple symbol as the highest form of hospitality rendered. The pineapple symbol is also an accent that is strongly welcomed by their hospitality industry where display screens of pineapple themed components and decorations on wall papers and furnishings, are famous. Virginia highlights many traveler locations that imbibe the use of the pineapple into its architectural landscape. The Shirley Plantation highlights 3.5 feet of wood pineapple constructed in the late 1700s on the peak of the roofing line as a program of hospitality and as an invitation to river tourists concerning the plantation. The establishment also highlights making use of gorgeous pineapple themes within its properties.

No one can for that reason give the historical, social and economic effect of the pineapple fruit which was when compared to the pinecone. While the production of pineapples have fueled the economies for the states of Florida and Hawaii, the symbolic styles and good appearances of the pineapple has also led to much motivation in decorating principles and styles using distinct pineapple themed devices for the home and garden. The pineapple also continues to influence the hospitality industry in a number of these states which were responsible for offering this fruit to the remainder of the Americas, highlighting the deep significance connected to the sign of the pineapple.

Saturday, April 6, 2019

How to Plant Flowers in the Ground

How to Plant Flowers in the Ground

Have you ever provided much idea to concern: How do plants grow? As your most likely conscious, there is more to it than just plopping a seed in the soil and adding water.


A number of chain reaction and development aspects enter play. As soon as you understand these growth factors, growing any plant, flower or vegetable becomes a heck of a lot much easier and rewarding. Let's begin.


When you first plant a seed in the soil, germination must initially occur. As soon as the seed starts to emerge from it shell, that is known as germination. For germination to take place water is needed to soften the shell so the seedling can break through.


Depending on the seed planted, it might or might not need much water. For example, the Morning Glory seed has a hard-shell, which requires a good soaking.


When the cells inside the seed begin multiplying, the plant begins it journey through life. After a few day of cell development, the seedling breaks through its coat and extends up to the sky and listed below the earths surface.


The very first leaves you see emerge from the seedling are know as cotyledons. Under close inspection you'll see these very first leaves are thicker than others that follow. As the seedling continues to grow up, the primary root (taproot), with smaller sized roots grow much deeper into the earth.


At this stage of growth nutrients are very important for healthy, fast growth. These consist of, but are not limited to nitrogen, phosphorus, and potassium. These are significant nutrients all plants need to grow.


NPK is a term often found on fertilizer product packaging, which means nitrogen, phosphorus, and potassium. However, plants are an adaptive species, able to grow in water, soil and air.


As the plant cells multiply, the seedling continues to move in an upward and down direction. Soon new stems and leaves appear and flowers will start to bloom. Bear in mind; growing plants need enough nutrients for appropriate advancement of fruit and flowers.


Each plant species has its own dietary needs. Gather this information so the appropriate amount of nutrients can be used or changed. Continued development and development are dependent on these aspects, so you don't wish to look past them. Really, even a fully grown plant, shrub or tree needs its nutritional need satisfied.


As soon as a plant has reached its maturity phase, it is ready to replicate. To recreate, plants must have both a male and female reproductive system readily available. Nevertheless, there are some plants know as hermaphrodites.


Essentially this means any animal or plant that has reproductive organs typically connected with both male and female. Bulbs, corms, bulbs, suckers, runners, grafting, layering and department are other recreation methods of plants.

Click here for more information

Thursday, April 4, 2019

PH Meters and How They Work

PH Meters and How They Work

Acids and bases have complimentary hydrogen and hydroxide ions in a liquid medium. An option with more hydroxide ions than hydrogen ions is stated to be fundamental, and one with more hydrogen ions is said to be acidic. A pH meter utilizes an electrical probe to find the pH of a solution.


The pH meter contains 2 electrodes, called the sensor electrode and the recommendation electrode. They both consist of wires made of silver and coated with silver chloride. They consist of glass tubes with services of pH 7 buffer and saturated potassium chloride respectively. There is a small bulb at the end of the sensor electrode which is made from a permeable glass membrane with silica and metal salts. This membrane is made very thin so as to lower the resistance brought on by it. It is this bulb which is dipped in the wanted solution in order to determine pH.


When the probe is dipped in an option, hydrogen ions replace a few of the metal ions from the bulb. Hydrogen ions, being much smaller sized in size than metal ions, have a much greater drift speed. This increase or reduce in hydrogen ion concentration depending upon the acidity or alkalinity of the solution alters the voltage measured.


The pH meter can therefore, be considered a battery, with the voltage varying with the pH of an option.


pH is a temperature dependent variable, and pH meters, for that reason, often contain automatic temperature level payment, where the temperature level is fed to the meter, and pH is automatically calculated for that temperature level.


Calibration of the pH meter is one of the most important parts of using a pH meter. The meter merely measures voltage and needs a reference so that the pH can be computed from it. For this function, buffer services are used, which have continuous pH worths and resist change in pH. Among the buffers used is the pH 7 buffer, which puts the probes at the isoelectric point. The other buffer used is either pH 4 or pH 10, depending on the nature of the solution to be determined. The temperature level of these buffers need to be at 25 C.


Some safety measures to be observed while handling pH meters are that the probe needs to be washed completely after each use. De-ionised water is used for this due to the fact that ions present in normal distilled water might disrupt the calibration. The probe should never be wiped, since this leads to a build-up of electrostatic charge, resulting in erroneous readings. The electrode needs to be totally immersed in the sample and stirred gently to offer a homogeneous sample. The bulb of the probe is really vulnerable, and should constantly be managed with caution. It must always be kept damp and saved preferably in a pH 5 buffer.


Maintaining pH is really important in biological circumstances, and plays an essential role even in everyday life, unbeknownst to commoner. For example, soil at a specific pH is good for specific crops. Also, maintaining pH prevents milk from turning sour. Organisms generally preserve their biochemical procedures within certain pH limitations. pH meters are thus, crucial for the pharmaceutical industry, among other markets, given that they help analyze products and make sure safety and quality.

Also, Check Out How to test soil ph with ph meter


How to build a wood shed from pallets

Constructing a wood shed is quite easy and makes a great task for the veteran wood employee and for the average Joe alike, however, the average Joe in all probability will be requiring more support in kind of a strategy. When developing a wood shed it appears practical to have a plan to follow otherwise things can and sometimes rapidly leave hand. Although it might be simple for knowledgeable woodworkers and amateurs to build a wood shed, but some help is very helpful at the same time.


The web has brought us along way with regards to do things like planning on building a shed on your own. There are lots of resources online that will show you how to develop a shed. As enjoyable as it will be to develop a shed, it's going to even far better to have a plan on how to execute every parts appropriately.


The purpose of a wood shed is normally to keep equipments like tools, lawnmowers and garden tools. Understanding what the shed is for is the preliminary step in making your shed. Without that understanding you will end up with all sorts of cluttered mess all over the place and having the ability to find your belonging will be beside difficult. It pays to have that determine firstly in order to enjoy having your shed rather than another nuisance.


For finding out the total size of the shed; some thoughts ought to enter into the decision process. Some key products to put in factor to consider is going to be, initially how big is the offered area in your back yard, The particular square video of the shed when compare to the house. Your wood shed's style and design should match those of your property for optimal worth. Sound judgment goes along way, you won't wish to have a huge wood shed in a little backyard. You won't have anyplace delegated do anything.


When picking the materials to build your wood shed keep in mind that that's when choice about styles might come into play. There is a range of materials to select from like shingles, siding, plywood and naturally clapboards. Every one of these elements will assist in offering your shed an original feel and look. You will be needing more products than as listed above but a minimum of that need to point you in the right instructions.


The moment you choose all the components above you know it is time to formally start your building procedure. It might be rather appealing to glance over the steps above and start putting your wood shed together and not really investing at any time for building your strategy. They're necessary actions nevertheless and really should not just glance over them. It is strongly advised to take some time now and hammer out every detail than to need to stop production entirely for too little preparation.


You can either invest in a strategy or draw your own from scratch that's the two main choices that are readily available. It is recommended to buy all set to use plans as that will assist you at the start if you specifically don't know how to draw your own. All set made plans are normally looked into so all you have to do is execute it or customize it to your similarity. It is extremely valuable to opt for resources that will offer you more than just one strategy so that you can have selections to choose from

How to Build a Wood Shed

How to Prevent Weeds From Invading Your Garden

How to Prevent Weeds From Invading Your Garden

One of the biggest pet peeves for the garden enthusiast is weeds. And unfortunately, these nasty developments can not be totally avoided - in fact, you might probably ask any gardener out there and she or he will inform you many stories about terrible weeds growing in the garden. Nevertheless, there is, obviously, a way of eliminating weeds. This is a guide on how to prevent weeds from destroying the plants in your garden.


First of all, if you are currently experiencing the quick development of weeds in your current garden, get rid of them first! There is no point trying to damage new weeds if there are currently fast-growing ones attacking your garden in the first place. Whether you wind up digging them up, slicing them, or hoeing them, you'll have to do whatever it takes to take out the origin of the issue.


The second thing you need to do if you want to learn how to prevent weeds is to come up with material called "mulch", which is generally anything that can cover the topmost layer of soil - this can consist of things of nature such as ground bark and leaves, and even the most not likely suspects such as papers, and even an unused carpet. By covering the soil and keeping it under shade, you are able to avoid any other weeds from growing in it. Try to cover your soil with up to 3 to 4 inches of mulch for maximum impact.


If you have shrubs, use these plants to your benefit! Let them grow to their optimum size as they will have the ability to keep soil cool under their height and avoid weeds from growing by choking them even before they can cause any problem to your soil, garden, and other growing plants. You can do this by fertilizing the soil where your shrubs are very well throughout the growing season.


If you must, use ground covers that can spread out quickly so that weeds will not even get the possibility to grow and establish in the soil. Some of these ground covers consist of vinca or hypericum. Foliage makes it tough to feeds to grow to their complete potential.


Finally, pull out weeds frequently - this is the crucial to a weed-free garden. Correspond and examine your garden constantly for any indications of weed growth. Do not wait on them to grow before you pull them out. Pull them out as you first identify them! This is the most crucial thing to remember to make sure that your garden is free of any destructive weeds.

More Info.


How to Pull Weeds

How to Pull Weeds

Some of my friends state that I am a little insane because I enjoy doing lawn work. Although it is a lot like housework (never entirely finished), there is a good deal of satisfaction in walking away from a flower bed after having rid it of weeds and letting the plants that we really wish to see show through. Of course, if it is refrained from doing on a consistent basis, the weeds really do acquire the advantage. Then, instead of caring lawn work, I find myself wishing for an easy way to produce the result I wish for. As of yet, I have not discovered a herbicide that will discriminate between what I want and what I do not want, so I am the one who needs to make the judgment and pull out the unwanted growth one by one.


As I work in my flower beds, I frequently reflect on the fact that Jesus provided many illustrations using seeds, trees, fruit, plants, sowing, pruning and gaining. As a result of the fall, the ground was cursed and work became an effort instead of a happiness (Genesis 3:17 -19). There stays, however, the charm of God's creation all around us. If we are fortunate enough to have the stewardship of a plot of earth in which we can plant and reap, then we partner with God in His garden business.


In my garden, I have experienced a variety of weeds. A few of them have a single root. If that weed is pulled out by the root, terrific! If not, it will return. Others have complex root systems that make them next to difficult to take out. They need to be dug out. In those cases, I keep in mind that the Lord stated that He was going to leave the tares and the wheat to grow together, and do the weeding at the end of time (Matthew 13). Often I make a comparable choice. I will handle those weeds again and again in order to save the excellent plants that are growing near them.


The job of weeding advises me of sin. Possibly you, like me, have found that weeding, like ridding your life of sin, involves the following.


oWeeding is backbreaking work. If I do not remain alert and "hoped up," sin keeps coming back. If I do not keep up with the weeding, the weeds overtake the garden. Vigilance is the essential!


oIt helps if the weeds can be brought up by the roots. If possible, it is best to stop sin at its source. For example, my nature is to stress and be afraid of unidentified scenarios. That is the reverse of faith. When fear raises its awful head in my life, I have to go back to the fundamentals: relying on God! As my husband says, "Fear and faith can not occupy the very same space."


oSometimes I need help. The task of weeding is a bit overwhelming in some cases, particularly because my hubby and I travel much of the year. Sometimes my spouse, a good friend or a neighbor will sit with me and help me take out weeds. Also, an accountability partner can typically see an area that is displeasing to God that I have neglected.


oWeeding is easier if the soil is soft or wet. If you ever tried to pull weeds in tough, dry soil, you understand how difficult it can be. Also, it is simpler to dispose of sin when it is fresh and identifiable as sin. The longer sin is delegated harden in our lives, the more difficult it is to get rid of.


I started this article by discussing just how much I love to see new development and flowers in my garden. That is how I want to end it as well. Weeding, both in my garden and in my life, is well worth it.

As I observe the flowers in my garden, I am reminded that a garden is not simply one flower. It is many flowers. You and I become part of a big garden that God has actually planted.


click here

Saturday, March 30, 2019

How long does it take to grow a pineapple

How long does it take to grow a pineapple

Pineapples are actually reasonably slow growing Bromeliads. Coming from slips, they take approximately a year to develop sufficient to develop a flower for fruit.

Coming from fools concerning 1 1/2 years to constitute flowers and also coming from cuttings they can take 2 1/2 years to develop sufficient to blossom.

As quickly as they floral it takes another 6 months for the fruit to develop.Pineapple is a popular and extensively used fruit product, which you ought to acknowledge with currently.

It is actually used in beverages, cakes, non-alcoholic refreshments and also as portion of salad, but tons of people are actually uninformed of the fact that the plant remains in fact so easy to expand they will definitely have effectiveness from it even if they perform not strive.Growing a blueberry plant is instead of a stretch, as pineapples do not grow on trees

I used to presume they do, as well as people climb to 30-40ft using some form of going up belt to collect them with a machete, I suppose it is actually a typical oversight due to the fact that when I inquired my sweetie she explained she presumed the identical.

Pineapples expand on plants. This plant involves 3-5 feets high as well as about the very same in diameter. It looks like as if the fallen leaves in the leading of a blueberry developed 3 feets long. Which is actually a somewhat specific presumption as these fallen leaves are precisely that.Growing a "tree"like that is really easy once you understand just how to stay clear of the traditional errors related to it.

1. First and also essential is actually to recognize just how these plants grow, and also how you need to navigate to increasing them. There are actually no seeds or divisions to graft. The common error listed here is to believe you'll need the whole pineapple to develop a plant. You don't use simply the fallen leaves and about an inch of the fruit still one it.

2. Excessive water. While pineapples develop on essentially any environment, it is actually best prevented too much water. If you reside where it storms a lot you're likely much better off trying a conservatory flowerpot, a big one, to grow it.

When you in the beginning try to grow the plant. allow the cut leaves behind as well as a part of fruit dry out for a while to avoid fungal concerns, which is actually one of the most common problem trying backyard lovers come across. When you grow it water regularly, but not regularly. As quickly as a full week is actually most likely around suitable, consider it as some kind of an exotic.

3. Collected too early. Immature blueberry is dangerous as well as will certainly trigger a number of negative effects explosive looseness of the bowels as well as oral cavity burning simply to point out a handful of. Perform not choose it when it's green because you are going to have major issues.

Wait up until the beyond the fruit product is a brownish or even golden shade and take it then. It will certainly stay in the 2nd year of planting the pineapple "tree ", due to the fact that the varieties is actually biannual. Originally, it develops the leaves and also the 2nd year it pops the flower petals as well as the fruit product, which is actually the drug of fed flowers by the way.

Visit our site to find out how long does it take to grow a pineapple

Friday, March 22, 2019

How to grow mushrooms outside

How to grow mushrooms outside

Portobello, Shitake, White Cap, Oyster. These are just a few of the many types of mushrooms offered in your market. Real that you buy most mushrooms in the market but would it offer you greater pleasure when you grow them yourself?

Looking at those white globs would make you believe that it might be too tough to grow, a lot more cultivate mushrooms. But then again, looks can be deceiving. And it sure does! Mushrooms are among those things that can undoubtedly record your creativity. They might appear fragile to take a look at, but no professional hand is really needed to grow these infants.


What type of mushroom do you want to grow?

This is a fundamental part of the process if you want to cultivate your own mushroom garden. The reason why you need to understand the type of mushroom is each mushroom has different needs. Some mushrooms are better used as dowels and other need to be spawns. But for novices, it is recommended that you use mushroom growing sets so it would be easy to do, plus, this can become a little job over fall or spring.

Another factor that you need to think about is the substrate where you are going to "plant" your mushroom spawns.

Log Substrate

Some mushrooms are much better planted on logs such as willow, oak and beech. These include the oyster mushroom and the shitake mushroom. You do not plant directly onto the logs, actually. You need dowels for that. These dowels are filled with the mycelium, the part of the mushroom from where the mushrooms that we consume get up. These dowels are then inserted into the log, sealed with some wax to prevent any contamination, saved in a dark and dry place up until the mushrooms are ready to be gathered. The logs need to be protected from direct sunshine in addition to strong winds. So, much better cover them in a black polythene bag. It would take around a year and a half for the fungi to colonize the whole log.

Straw Substrate

Perhapsone of the easiest substrate to handle is the straw. Initially, you need to sanitize the straw. Do this by putting boiling water on the straw. Once the straw has actually cooled spray the spawn, which is included in the mushroom kit. Ensure that you shake the bag with the straw and the spawn to spread out the spawn evenly. Seal the bag. Place this is a dark and damp place. The mushrooms can be collected in about 6 weeks.

How to Growing Mushrooms Outdoors

This is one of the standard ways of growing mushrooms. You use grain generate to inoculate the mushrooms into the manure or soil substrate.


How to eat garlic for erectile dysfunction

How to eat garlic for erectile dysfunction

The Discovery Health Channel simply recently ran a program about garlic and how its outcome might look like those of the male enhancement drug, Viagra.The research study consisted of 8 middle-aged, English people experiencing impotence (ED) who would, in conjunction with a diet strategy consisting exclusively of veggies and fruits, take in 4 cloves of garlic a day for 12 days.

While the thriller was (and is) incredible, let's take a look at how Viagra ended up being so popular in such a brief time.A couple of years back, researchers at the pharmaceutical huge Pfizer were looking for a medication that would boost cardiovascular function and reduce both chest discomfort and high blood pressure.In amongst those standard oversights - remember the discovery of penicillin - the drug being examined did not have performance for its wanted function but had an unfavorable impact of increasing blood flow to the male reproductive organ.

The rest, as they state, is history; what makes us stand at attention here is that garlic may hold comparable effects, albeit with less threats since garlic is naturally happening.Allium sativum L., or garlic, stays in the onion home Alliaceae and, according to a research study, is among nature's most attractive and quickly provided herbs.The University of Maryland's Medical website claims, though the research study is not definitive, that garlic can help avoid heart disease (consisting of atherosclerosis, or plaque accumulation in the arteries that can obstruct the circulation of blood and possibly trigger heart disease or strokes), high cholesterol, and high blood pressure, while also enhancing the body immune system.

Considering that impotence is routinely induced by concerns with blood circulation, garlic's outcomes rationally would help with ED. A research study launched in 2000 by the United States Department of Health and Human being Providers found that using garlic helped in reducing the possibilities of heart issues; nevertheless, garlic appeared to do little to lower levels of bad cholesterol.Of the 8 males in the British research study explained above, 6 of them revealed increased activity and blood circulation.

Nevertheless, prior to you head out to the shop and start warding off vampires, take a look at the other aspect that was consisted of in this experiment: for twelve days, the clients taken in no fatty foods, coffee, or anything else that did not come straight from the ground to the table.This fact shows that garlic alone might not return life to the bedroom. Consuming healthily, as any doctor will concur, is the best way to extend the life of the whole body.This research study supports that fact more than any other.

to read the full article on How to eat garlic for erectile dysfunction click now.

How Ginger Helps the Digestive System

How Ginger Helps the Digestive System

Ginger, which is also referred to as ginger root, has actually been used for centuries to help relieve complications associated with the gastrointestinal system.You can acquire

fresh ginger root year-round in many grocery store stores.And if you are a gardener you can also expand your personal ginger root, even though you reside in a cooler weather, as you can expand it in containers in your kitchen.When purchasing ginger root is sure to buy clean origins which

insist and smooth on the outside.The benefits of ginger are due to the volatile oils known as gingerols as well as shogaols.These oils are what creates

the appetizing taste of ginger and also have a warming impact that can help to rest muscle mass and lower inflammation.Here are actually some ways that ginger can help your gastrointestinal body: Kick back Muscular tissues The warming impact of ginger helps to ease as well as relax your abdominal muscle and also rises circulation.This helps to stop cramping and also puking as a result of kinetosis, morning sickness, fever or even medical treatment.Improves Digestion Ginger root helps to strengthen the digestive function of your food items through secreting a lot more juices to help break down the healthy proteins. This can help you to stop bloating, fuel, stomach ache, heart get rid of, looseness of the bowels as well as many other stomach symptoms.Prevents Stomach Abscess Lesions hurt or sores that can build in the belly or even intestinal system as well as

may be extremely agonizing. Ginger helps to make even more liquids that help to reduce the effects of the dangerous belly acids that contribute to the buildup of ulcers.How To Secure these Advantages In order to get these advantages ginger root, you need to make ginger a part of your day-to-day diet regimen. There are actually many manner ins which you can incorporate ginger to your diet regimen, but my favorite way is to drink ginger

tea. You can make the tea in as low as 10 to 15 moments. Merely grate some new ginger and also steep in scorching water for about 10 minutes. You can consume this tea after a dish and also get instant benefits.You can also use clean ginger root in your mixed greens dressings for a tangy flavor. You can use your favored substances as well as cannabis like


cut cilantro, and also lemon or even lime juice, your favored oil and a dash of unrefined ocean salt.Grated ginger root also goes well with all your meat and vegetable recipes. You can use ginger root in your marinates, spray it on before baking or even add it towards the end of the cooking food procedure for a more powerful taste of ginger.

Visit our site  to Learn more about How Ginger Helps the Digestive System

Thursday, March 21, 2019

How do Lawn Sprinklers Work

How do Lawn Sprinklers Work

Keeping and caring for a garden as well as backyard is not as fundamental as choosing dandelions. Hrs of work are put in once a week through various green-thumbs that want wealthy and also developing landscapes.If you have really
ever tried to preserve such an area you understand that without water, all the attempt and preparation will certainly not enable just about anything to increase. Simply maintain analysis as well as permit me reveal you how carry out lawn sprinklers work.
While actually watering a place is actually regularly a choice, many individuals opt forthe dependability and also conveniences of possessing an ideal sprinkler system set up. It goes without saying, it only takes a number of times of sun without water before plants begin wilting.There are a number of numerous sort of automatic sprinkler.
To start with, there are actually regular types that are above ground as well as briefly put together. By linking a popular garden pipe to a bib and also linking water displacing head, you have the basis of a watering system.When one photos an ordinary garden lawn sprinkler, a variety of our company think of an usual sprayer that sways backwards and also ahead along with about 10
individual streams. This is actually an excellent alternative for covering a larger location, having said that, you will certainly need to physically move the sprinkler system around to deal with all locations and also afterwards closed the supply of water off when that specific area is actually done.Oscillating sprinkler system run in similarly, regardless they are boosted along with extra spins. As the water makes its technique with the sprinkler, a few of it looks at diversion sideways of the
landscape sprinkler, whereupon it is actually strongly created to energy a little wind turbine. The generator operates additional like an engine and takes advantage of the pressure of the water to transform the sprinkler system as well as start the water procedure.Every oscillating sprinkler is actually improved with a turbine that makes the lawn sprinkler turn, thus dispersing water.
This kind is actually far better for sprinkling a much smaller sized and also more specific site, however even this procedure requires physical concentrate on closing the sprinkler off and also place all of them away.
Coiling up a long garden pipe is actually perhaps one of the most laborious portion of making use of standard sprinklers.Contrary to these old-fashioned kinds of lawn sprinklers, there are actually in-ground lawn sprinklers that are gotten ready along with the main operator as well as strengthened along with flexible cooking timers.
The principal controller is the component that takes care of the operations of the lawn sprinkler when the changeable cooking timer is actually switched on, the operator sees to it that the valves are actually exposed.
The lawn sprinklers are actually dislodged of their(in-ground)gaps due to the stress of water when the system is actually promptly turned on, as every sprinkler possesses it's own control valve. To stop the sprinklers from instantaneously activating when it rainfalls, the landscape sprinklers could be matched with rain meters.
Automatic landscape sprinklers do work in a different way coming from the above assortment given that they make use of electrical energy in sprinkling the backyard or even landscape.
These landscape sprinklers remain in fact boosted along with an electric operator and clock unit for programs.The owner of a sprinkler system can use the time clock to ensure that the sprinkler has the potential to promptly start sprinkling the backyard at a supplied time.
This promises your garden gets the needed amount of water whether you are home. With some initiative and also the help of an automated sprinkler system, you can ensure that your yard will certainly get the water it needs to have daily.
click here

How to grow grape vines

How to Grow Grape Vines

Growing grape vines is a great pastime and would advise it to everybody. In this post I have created some tips that every beginner will need to know before they are ready to start growing their own grape vines.


Let's start by picking the right sort of a vine. To first question I want you to ask yourself is what your function is. Some people wish to grow a grape vine so they can start producing their own wine or make grape juice. Others are not interested in those things, but would rather have some yummy eating grapes. Others still, are not even thinking about grapes but would similar to to cover their outdoor patio with some great looking vines. Your function will identify what kind of grape vine to select.


I understand that some people would like to have both eating grapes and red wine grapes at the same time. Well you can. But if that's what you want I would recommend that you plant 2 different sorts of grape vine - one that is good for eating and one that benefits red wine.


Now when you understand what you want your grape vines for, it's time to head out and buy some plants. You'll still need to know which plants are suitable for your geographical location and I would suggest that you speak with a specialist on this. The simplest thing to do is merely to go to among the next-door neighbors, one that already has a well growing grape vines, and ask him a number of questions. In my experience, people are always more than happy to discuss their vines.


Now go and find a good site for your vine. The vines will need a great deal of sun and a rich soil, so choose sensibly. I would recommend that you build the assistance for your vines before you start planting. If you try to do this later, you may harm the plants. There are several types of assistance that you can use. To build the most standard one, merely drive some stakes into the ground and after that connect them with wire. If your grape vines will be growing over a wall, you don't need to do anything at this moment, but you might need to put a number of nails in that wall later on. So keep that in mind.


Now it's time to put the plants into the ground. And think it or not, that's the simple step. Simply dig a small hole, put the plant in, and tap the dirt around it. Done. You've simply became a vine grower.


From now on, you'll have to make sure that your vines have a lot of water, are fertilized and pruned. Again, consult an expert in your location to find out how much water and fertilizer is required. This will vary from location to location. As far as pruning is concerned, you will not have to do any of it in the very first 6 months. So in the meantime, just relax and let your vines grow.


If you wish to understand more about how to grow grape vines, how to pick the perfect vines, how to plant them, take care of them and how to make certain they produce as many grapes as possible, then I would recommend that you have a look at this book on how to grow grape vines quickly It's filled with useful recommendations on generally whatever that relates to vine growing and grape production, so I'm sure you're going to like it